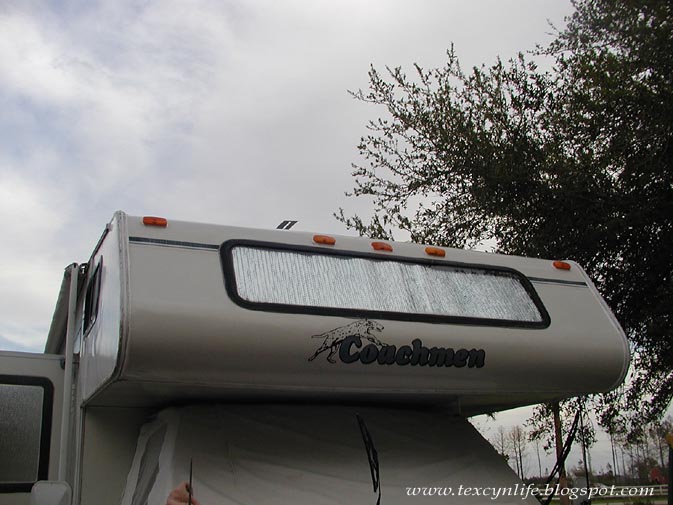
Showing posts with label RV maintenance. Show all posts

Monday, May 27, 2013

RV maintenance list


I'm making my RV check list on things that need to be done maintenance wise. 

As you know, owning an RV also means maintaining it. If you don't, you can shorten it's life & the life of equipment as well. 

Plus I want everything in good working order! 

I'll admit to watching a lot of YouTube RV videos. But they are quite handy in learning how to maintain, repair or fix things. They are also fun on my down time to watch for camping & such. 

So on my check list so far that I've put in notes on my phone are:

* Check water heater anode & clean out out that space with water. 

* Check the water level in my coach battery - might as well check the engine battery too. I get too lax about not checking those. 

* Check my outdoor fridge compartment to be sure it's nice & clean. Also when doing this, always look for yellow stuff. Which I hope I'd not have since my fridge is only about 2 years old!!

* Clean the exterior heater compartment. Although I really don't use my RV's heating system, it's still a good idea to check & clean it once a year. Mud daubers are my worst enemy! They will get in everywhere. I even found a good sized nest when I changed out a front turning signal light! And they eat through my plastic strips that are around my exterior compartments & entry door . At first, I thought someone had poked a finger through, then realized it was mud daubers when I saw them at work! 

* Install my GenTuri, which I've not really messed around with yet. Would be a good idea to install it, test it & run my genny for awhile anyhow. It's time to run my monthly generator exercise.

* Reseal my roof again with Dicor. I do that yearly & have not done it yet this season. It's not dire that I do this right now, but will want to before it gets too deadly hot outside. Working on the roof in the Texas heat isn't very desirable. 

* Eternabond the section of the overhead rebuild on the roofline. Although they caulked it & all, I'd still feel better with that extra bit of protection. 

* Fix some of my outdoor bay doors. Some of the latches have fallen apart, so need to do that before any big trips as well.

* Buy another spare tire cover. The weather ate my last one, it just crumbled in pieces - I use the vinyl covers, so they don't last all that long with the weather elements. I think I get about 2 years out of them, but looking at an ugly spare tire isn't desirable to me. 

* Lubricate my TV antenna - this helps in rolling it up & down effectively. 

* Wash & wax the exterior. Even if this means one section at a time, which is how I'll do it when I'm able to do this again. 

* Pull out & clean the awning fabric. 

Any suggestions on what ya'll would check on? 

What does everyone do to their RV's to keep them in shape? 

I'd love feedback! Plus it might help if I've over looked something.

Checking the tires & such, I do that before I pull out of the driveway any time Ellie gets to leave the driveway. So that step I'll skip. IF I were to sit a few months without moving, then yes, I'd check the psi. 
And to note, I LOVE my extensions!! They make it possible for me to check my air pressure & keep up with it! 

 Thanks for stopping by!! 

~As always, be kind to your pets, clean up after them on your travels & respect your neighbor~ 


Friday, March 29, 2013

Maintaining The Clearance Lights

**I wrote this post a few weeks ago,around 3/08/13  but once again, fell behind with all the things I was doing at the time & it never got posted. So I'm finishing it today to get it posted & done with! :-)

***********************

Yep, I'm still at it!

I know, I know, ya'll are saying "Stop it Already!".

But it's gotta be done.

Then we all can sleep better at night.

So over the weekend, I maintained my clearance lights.

When they rebuilt the overhead cab, you would have thought that "maybe" they'd put on new lights? Or at least be sure they all worked???  Nope.

So it was bothering me that 2 of them were burnt out. It also bothered me that I saw dirt building up under the covers of both front & rear lights.

So I went to work. Of course, when I had the overhead leak again, I panicked. Imagine that huh?

I put duct tape over the tops of all the clearance lights! Perhaps I went overboard, but leaks will put you into panic mode & make you do things like that.

The duct tape left residue. Sigh...

 Light cover with residue - bottom light cover.


Residue all cleared off! It wasn't a hard job. I used some remover & it worked well. Goo Gone I think is what it was.

I had one light on the front that was too corroded to work. That bothered me. I'm a stickler for things like that. Could I have just left it as is? Sure. Texas doesn't inspect those, but it's one of those things that with me, everything has to work!

So I rewired it. 

I then took off all covers, cleaned them, cleaned the bases & returned the covers. Checked to be sure that all lights were working, then I caulked around all of them. Front, rear & side clearance lights. Done! Yay! DONE! I say, DONE! For at least another year or so :-)   I even caulked around the seals on the covers, not just around the bases. When I noticed how much dirt built up under the covers, that alerted me that moisture was probably getting in there too. So I wanted to cover all bases & I did.

 New caulk lined around the cover & the base to be sure to protect any moisture from penetrating.


Since I had my caulk out still, I also cleaned the old caulk off of my door handle & my exterior electrical outlet. I replaced that outlet last year. The old one was white & really weathered, just waiting to crumble at the slightest touch. It was an easy replacement though.


I use exterior outdoor clear silicone caulk, but I wonder sometimes if I should use the white caulk instead. I'm never sure which to use, but I kind of like the clear as it's just a cleaner look.

Below is a video of my step by step process of redoing the clearance lights if you are interested:


Tuesday, February 26, 2013

Taking a break -- Horsing around

I'm taking a break from RV stuff for today. 

I hope I can accomplish that. 

Bought some rubbing compound for the hood & side scrape marks from Feltons ladder, but it's 50 degrees outside. 

Plus I could barely walk yesterday, so I really need to give my body a break. Which is frustrating because in the past, I could wash & wax my entire RV in 2 days time! Yea, it hurt, but nothing like I am now.

Now I'm in pain & can barely move after just washing it! 

That sucks, but I'll get better. 

So I need to give myself at least another day before trying to remove the scuffs, caulk & sap. 

I called the local RV place to see if they could work me in for the generator repair. That's not gonna happen, the first reservation they have is April 1st! I don't want to wait that long & well, why would I want it repaired on April Fools day!! No thanks! I got hurt on Friday the 13th, lesson learned! Ha!

It's lunch time now at PPL, I'll give them a call to see when they can work me in. I can wait there & browse through RV's while they work. Hopefully, it won't be a very big job. Hopefully. Cross those fingers! But don't type while they are crossed -- that creates typos. 
                
                                        ******
OK, time to horse around!

Ever seen a brindle horse? Me neither. I found these images on the internet. 


Which above image isn't actually a brindle horse? ;-)  

The possum I did myself when a friend told me he had a dream about brindle possums. 


                           Yes, this one you can stare at for hours. Amazing isn't it!

~As always, be kind to your pets, clean up after them on your travels & respect your neighbor~


Sunday, April 1, 2012

Showin' mah durty side - leaky widows, check!

Hi everyone, it's been several days since I've posted!

Today's post is full of photos & a video all relating to a DIY project of how to fix leaky windows. So my apologies as I'm trying to be thorough with this project in my explanation of how I did this.


Been very, very busy lately. Took the RV back to the shop on Tuesday for the overhead window leak. Spoke with Mitch, the owner. He was not happy about the fact that it was still leaking & how the sides were applied to the RV during the rebuild. So he had them reseal & line the fiberglass sides up - they now fit properly into the frame. He had them clean up the edges of the framing too. And they took the front overhead window out, took out the glass, resealed it, then reseated it back into the window opening. Was told it was tested & no longer leaked. Got the call on Thursday that it was ready! Yay!! So I head over there when I can, the skies break loose! Well, that's probably a good thing...one of the guys went inside -- YEP, It's LEAKING!!! ARGH!!! So Mitch profusely apologizes, asks me to come back. I say, lets take a look. I can't keep doing the come back game. So their scratching their heads over this one. I say, lets go outside & look. I look up, yep, I determine it's not the window leaking, but it's the Coach Light in the center that is leaking!! So they get up on the roof, sure enough, water is sitting inside the cover. So they go to work, take off all the clearance lights (which should have been done during the rebuild, but it was overlooked!). All clearance lights are taken off, properly sealed down, then get a good layer of caulking when all installed again. Then I had to wait another 30 mins for the caulk to settle & for the rains to lift up. I'm pretty sure that was the problem. I've not tested it myself yet & we've not had a good rain since. But I needed to let the caulk seal & set before I go hitting it with water.

Let's hope that Ellie is now water tight!

Totally water tight.

Forever!!

Sadly, those clearance lights were NEVER sealed down properly! Not even by the factory. grrrrr

So, onto my leaky windows, even the ones that don't leak.

The day I took the RV over to the tire place to have new shocks & the tires rotated, I went across the road to Bluebonnet RV services. I spoke with Tim for his advice on my windows. He told me what needed to be done. So a few days later, I redid all of my windows. Yay, no more leaks that I know of!! My big picture window by my sofa had just recently started to leak, so I did it first. Then the next day, it poured rain -- NO LEAK! YAY! So then I set off to do the rest on the next chance I got. Did the rest all in the same day & I'm glad that project is finished & out of the way. So today, I want to share with ya'll on how to maintain or possibly fix a window leak. I hope this can be of help to others. Had I known about this sooner, I would have done mine a long time ago.

I put a video up on youtube, but for those that can't do vids, I'll also add detailed steps on todays blog.

Warning for those with short bandwidth or have to pay for vids, this video is almost 17 mins long:


So in text with photos, here are the steps:


Tools I used:
* Small head hammer
* Philips Screw Driver
* Shop vac with micro mini tools
* Bucket with cleaning solution - do not use bleach based products. I used Mr Clean. Bleach may break down components in the rubber glazing bead (some people refer to that as gasket)
* Old toothbrush for cleaning - scrubbing
* Another type of longer stranded brush to clean window tracks with


1. Remove glazing bead -- the rubber strip that is around the glass part of your RV window. I use the philips screw driver to carefully pry under the glazing bead to lift it, then I can pull it out.

See photos:


2. Drop Glazing bead in bucket of cleaning solution to soak while you clean window tracks. (do one window at a time, not multiple windows at a time)


3. Clean the window tracks, being sure to do a deep thorough cleaning. I first vacuum out the tracks, then brush dry with an old toothbrush, then blow the track out with the shop vac set on exhaust.
Then I dip the toothbrush in the cleaning solution & thoroughly wash the tracks carefully, don't want to soak them. Then I use my longer brush to get into the deeper part of the tracks, keep paying attention to all the little drain holes to be sure that they get cleared out. Inside of the tracks are 3 sets of drain holes, at least in my tracks. There are several drain holes in the felt part, then a few more bigger holes on the inside hard part of the track, then the holes that you can see from the outside of the window frame. You will want to really deep clean those tracks to clear the hole openings for water drainage from rains, washing the rig, etc.


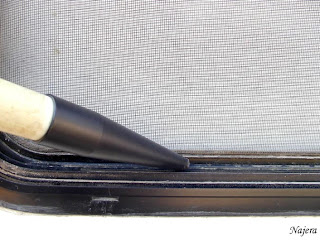


4. After the tracks are cleaned, then use your toothbrush (no, an old one, not the one you use daily!), to scrub the glazing bead that you've been soaking in the cleaning solution. After that is totally cleaned, then dry with a towel & you are ready to pop back into the window track. This is done easiest if you have your windows closed. In order to clean the tracks, the windows have to be opened, but to reinstall the glazing bead, the windows should be closed.

5. Reinstall the glazing bead. It can be a little tricky to reinstall the rubber beading, but don't worry, it is not really hard to do. Follow the ridges & pop the rubber grooves back into the track.  


It might be necessary to use a small headed hammer to lightly tap the bead back into place if you don't have a lot of strength in your fingers to push the glazing bead back into place. I lined mine up, pushed it in, then secured it in with light taps with the hammer along the edge of the rubber part. Do not tap on the metal frame or you will mar/scratch/dent it.

Viola! Finished! Now hopefully, this window will not leak in the future! It wasn't leaking, but this one was done for maintenance to prevent any future leaking.


Note: When reinstalling the glazing bead, be sure to work from the bottom of the window frame to the top of the frame. You can slide the GB into place at the bottom of the track once you get it started, so you don't have to start in the very corner. After you get it started, simply slide it as tight as you can into the corner of the bottom. You will most likely have a gap at the top. The elements of weather & sun shrink the rubber eventually, so it is not like it was when newly installed. It's best to have the gap at the top then at the bottom. You can fill the top part with some black colored caulk to prevent bugs & such from getting back under the GB.


When I did my big picture window over my sofa, it wasn't too bad, but was starting to leak. So I got that under control before any leaks happened. I was very pleased to find that it worked when we had a downpour & no water was standing on the track or getting inside of the rig! So I decided to do all my windows. I'm glad I did. I was shocked when I took the bead off of the kitchen window! WOW! Bug city! They had their own community going on in there! Bet they blogged about the mean lady that took their city away! City? They had their own country in there!!!


Yuck!! It took me an entire day to do this project. But then, it also took time for me to stop & video/photograph the project as I went along. It was definitely needing to be done though & I'm very glad I did it. I'm grateful that I can do these projects myself & it is a bit self rewarding when finished.
:-)

~As always, be kind to your pets, clean up after them on your travels & respect your neighbor~


Wednesday, March 7, 2012

Get Waxed - I'm half free!

Hi Everyone, hope all is well with ya'll.

I'm HALF FREE!! Huh? Only half? Which half? Left or right? Top or bottom? What the heck do you mean? OK, so the podiatrist released me today. So that's one doc down, two more to go! Actually, although I still have pain, the initial nerve pain is now gone due to the Tarsal Tunnel Surgery. The rest will have to heal in time. I have ligament pain, therapy will continue on depending on approval. The next step involves 10 sessions of heavy duty therapy - if it's approved. If not, I'll get on with my life either way. I'm ready to move on. I'm ready to put all this behind me. But I swear, sometimes someone does NEED to stick me in a big dog crate & LOCK THE DOOR!!! Why? Because I tend to over do things. It doesn't matter if I can or can not do things. I'll still try.

So, what did I do this time? Yes, I spent Monday washing the RV & waxing the truck part. You'd think that's enough, right? Well no. Because I tend to keep a supply of RV items. In those items is not only RV wash, but there's RV wax for the fiberglass too. Yep, I got carried away & tried to WAX the entire RV yesterday! I waxed till it got dark...but at that point, I had worn out the applicator. So it quit on the job. I threw it away, leaving myself with no applicator. Oh well. It was dark by now, so the rest would not have turned out very well anyhow. But I got most of it done. Just have to do the very top part of the back where it curves & the bottom section of the passenger side. Then done. And really, it's not that bad because I waxed the RV sometime within the past 6 months.
Am I paying for it? Yep. Ouch. Yep. But mostly in the foot & hand & a little in the right shoulder. But all in all, not bad. The foot is already used to abuse. As is my body because I don't know when to quit!

The wax I use & the pathetic sick, disgusted applicator that was mad at me at this point.
Ohhhhh, shiny! Unfortunately, the ripple on the edge by the drivers door pretty much stays the way it is. So long as all is good underneath though, it's ok. Bugs me, but it's really ok under there.

One good thing about paying attention to your rig & doing the maintenace stuff is that you notice things that need to be done! Such as this clearance light. Well, all the orange clearance lights on the overhead area. None were caulked down after the rebuild! So I ran caulk along all of them to keep moisture out. As we know, moisture is not good & this is one of the area's that it finds it's way inside to search & destroy! I stopped the little demons - hopefully.


I called Felton's RV service & we talked about the issues of the overhead cab area. He asked me to call him back for an appointment to bring Ellie back over to him so we could discuss these issues. He did promise me if there were any problems, to please let him know when he did the work on it. I hope I won't be without her again like I was before. I've moved some of the dogs back inside & am trying to get my things settled & organized back inside as well. Well, most of the stuff is still laying about. Tomorrow thunderstorms & no appointments, so I hope to get those things put away tomorrow! I will feel much better when that's accomplished!
 Oh & last year, I replaced all the rear clearance lights. What an improvement that was, plus they all show the light up so much better at night. I've done upgrades to her as I've gone along. I admit that I get insulted when people drive in the driveway here & ask if I want to sell them my OLD CAMPER! Grrrrrr. They have no idea what I've put into this rig, nor how much I keep it maintained. They think they can just pick her up at the drop of a dime. Ain't gonna happen. She'll be in better shape than some of the newer ones I've toured over this past summer. In fact, she is in better shape than some of them!
Another funny thing was Felton's wanted to check all my systems to see if everything was in working order. I know it all works. I live in it! But I said, sure go ahead. They could only find one thing they wanted to change. They wanted to disconnect my detectors because they run off my battery continually & wanted to put a shut off switch on them. I said no, I want them on all the time. I live in her! Plus if I were to store her, I'd shut off the battery switch & disconnect the cable. It's pretty easy when you are only running off of one battery anyhow.


I was alone tonight. I was hungry, so needed to cook something. Last night, I bought breakfast stuff, so I made breakfast for dinner  - yum! I fried up some OreIda hash brown O'brien potatoes (frozen with veggies in them), then mixed in scrambled egg & cheddar cheese. And of course, had to top a little picante on top! Had that with 3 slices of turkey bacon. I love turkey bacon. It was quite a yummy dinner! And not terribly heavy. I do like cooking & doing things in my little house :-) 

Oh & another thing I need to do tomorrow is get my dogs brushed out. Bravo thinks he looks great this way though! I went out to get him & he had a halo, which was, well, the entire way around his head & wrapped nicely into his ears. When I got it off, he tried to take it back! Silly dog! He said he liked his neat headress! Maybe he's actually a child of the 60's, but those were't posies. They were stickers!


~As always, be kind to your pets, clean up after them on your travels & respect your neighbor~